It is 2:00 AM on a Tuesday. The studio is quiet, save for the hum of overworked laptop cooling fans and the frantic clicking of computer mice. You have a brilliant architectural concept in your head, a fluid, dynamic space that perfectly answers the brief your professor handed out three weeks ago. You can see it clearly in your mind’s eye. You’ve sketched it on trace paper. But right now, you are staring at a chaotic grid of grey lines on your monitor, locked in a desperate battle with a piece of legacy Computer-Aided Design (CAD) software.
Instead of refining the spatial flow or tweaking the atmosphere of the room, you are Googling how to fix a broken polygon mesh, or why your boolean operation keeps failing. You are not designing anymore; you are troubleshooting.
This scenario is a universal rite of passage for university students in architecture, interior design, and spatial planning programs. The gap between a creative concept and a finished, presentable 3D model is often a treacherous terrain filled with steep learning curves, clunky user interfaces, and software that feels more like a punishment than a tool.
But it does not have to be this way. The modern academic journey requires agility. It requires tools that get out of the way of the creative process. This is the era of the design shortcut, where software like Planner 5D is proving that learning to model, render lighting, and apply textures doesn’t have to be an intimidating, tear-inducing hurdle.
The CAD Intimidation Factor: Why Legacy Software Crushes Morale
To understand the value of a “shortcut,” we must first look at the traditional path. In most university programs, the first year is a trial by fire. Students are introduced to industry-standard programs, heavyweights like AutoCAD, Rhino, 3ds Max, or Revit. These programs are incredibly powerful; they are the backbone of the professional design world, capable of building skyscrapers and engineering complex infrastructural grids.
However, they are also notoriously hostile to beginners. They were built for engineers and seasoned drafters, not for first-year students trying to understand the basic principles of spatial volume.
The intimidation factor stems from three main issues:
- The Interface Overload: Opening traditional CAD software for the first time is like sitting in the cockpit of a commercial airliner. There are hundreds of buttons, drop-down menus, command lines, and toolbars. The cognitive load required just to draw a room with a window is immense.
- The Hardware Barrier: Legacy rendering engines require massive computational power. Students often find themselves needing to purchase expensive gaming laptops or wait hours in the university computer lab just to see a low-resolution preview of their project.
- The “Tool vs. Creativity” Battle: When a student spends 80% of their time trying to figure out how the software works, they only have 20% of their time left for actual design thinking. The tool becomes the primary focus, rather than the architecture itself. Ideas are often compromised or simplified simply because the student doesn’t know how to model their true vision in the software.
This is where the academic paradigm needs a shift. Students need a sandbox, a place where they can iterate rapidly without the penalty of a steep learning curve.
Bridging the Gap: The Concept of a ‘Design Shortcut’
A shortcut in design does not mean cutting corners on quality; it means optimizing the workflow. It means finding a direct route from the neurons firing in your brain to the pixels illuminating your screen.
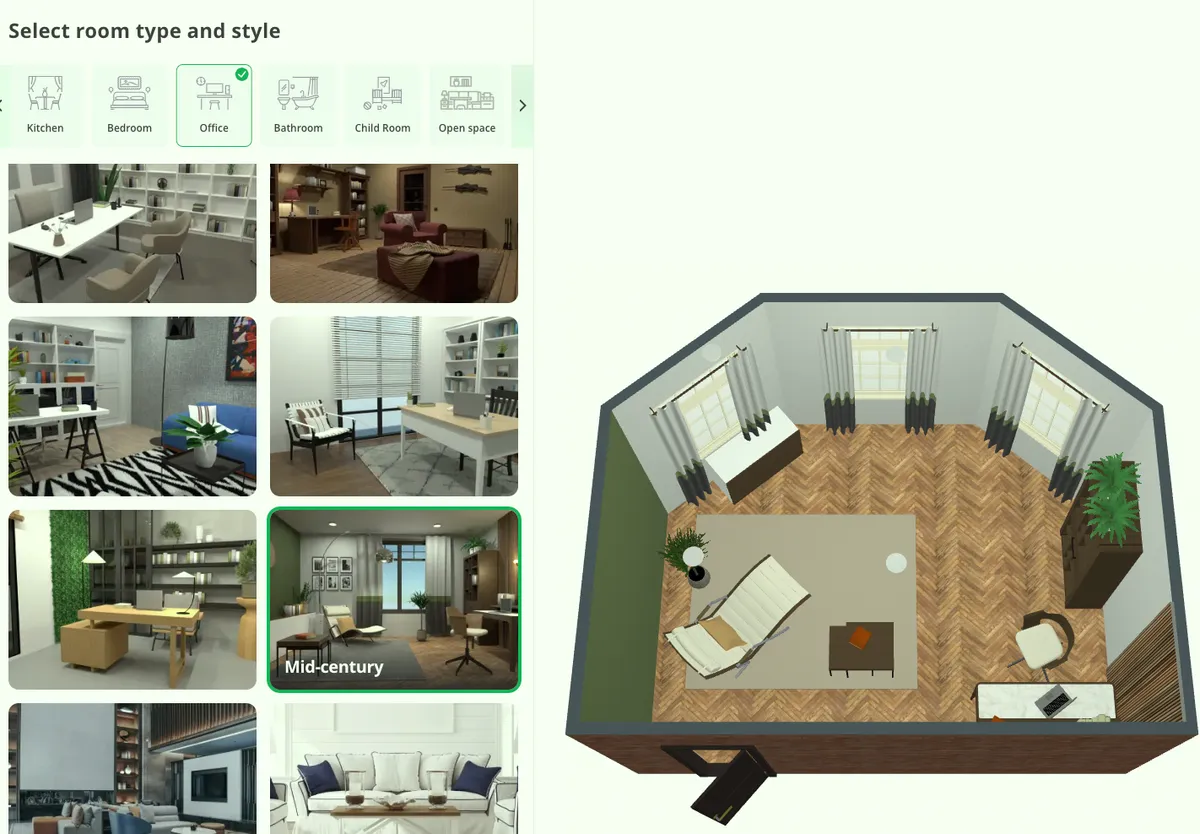
This is exactly where Planner 5D changes the academic equation. Designed with an incredibly intuitive, user-centric interface, Planner 5D acts as a bridge between the initial napkin sketch and the final studio presentation.
Instead of memorizing command-line prompts or spending weeks mastering complex extrusion algorithms, students can use Planner 5D’s drag-and-drop mechanics to build their spatial frameworks in minutes. You draw a floor plan in 2D, and with a single click, it is instantly translated into a navigable 3D environment.
For a university student facing multiple deadlines across different classes, this speed is a superpower. It allows you to mock up three or four entirely different spatial concepts in a single afternoon. You can test a brutalist concrete layout, then immediately switch to an airy, open-plan glass pavilion. This rapid prototyping is the essence of good design education. It encourages risk-taking because the cost of failure, in terms of time lost, is practically zero. If an idea doesn’t work, you haven’t wasted three days modeling it; you’ve spent thirty minutes. You delete it and try again.
But Planner 5D is not just a layout tool. Its true value for the academic lies in its ability to serve as a high-fidelity laboratory for the two most critical aspects of architectural presentation: lighting and materiality.
Mastering the Mood: The Laboratory of Light and Shadows
In the realm of spatial design, lighting is everything. It is the invisible material that defines a room. It dictates mood, guides the human eye, and establishes the emotional resonance of a space. A brilliantly proportioned room will look terrible under flat, lifeless lighting, while a simple, modest box can be elevated to high art with the right shadows.
Traditionally, learning how to render light in CAD involves a grueling process of setting up artificial “sun” angles, calculating global illumination bounces, tweaking photon maps, and waiting hours for a single image to process. If the shadow falls in the wrong place, you have to adjust the settings and wait all over again.
With Planner 5D, practicing lighting becomes an interactive, fluid experience. The software’s rendering capabilities are designed to be accessible but powerful, allowing students to focus on the art of illumination rather than the math of it.
Students can use the platform to rigorously test different lighting scenarios crucial for their academic portfolios:
- Harnessing Natural Light: You can effortlessly adjust the time of day and the orientation of the sun. Want to see how the morning light filters through a clerestory window and rakes across the floor? You can simulate it instantly. You can track how the shadows lengthen in the afternoon, helping you make informed decisions about window placements and sun-shading devices.
- Curating Artificial Lighting: Designing the nighttime experience is just as vital. Planner 5D allows students to layer different types of lighting, ambient (overall illumination), task (focused light for reading or working), and accent (highlighting architectural features or artwork). By placing virtual fixtures and adjusting their warmth and intensity, students can practice balancing a room’s luminous environment without needing an advanced degree in electrical engineering.
By removing the technical friction of rendering, Planner 5D allows students to develop an intuitive “eye” for lighting, a skill that will distinguish their work in every studio critique.
The Tactile Illusion: Experimenting with Textures and Materials
If lighting is the soul of a design, textures are the flesh and bone. The materials you choose communicate the weight, context, and tactile reality of your concept. A digital model remains a cartoon until it is grounded in the physical properties of the real world.
In heavy CAD programs, applying textures (often referred to as material mapping) is a tedious chore involving bump maps, specular highlights, and UV unwrapping. It is incredibly easy to make a mistake that results in a brick wall looking like stretched, pixelated wallpaper, or a wooden floor looking like shiny plastic.
Planner 5D bypasses this complexity by offering a vast, pre-calibrated catalog of materials and textures. This turns the software into a virtual material library, an essential resource for any design student.
You can instantly switch the finish of a wall from rough-hewn stone to smooth, painted plaster. You can test the reflective qualities of polished marble floors versus the matte, acoustic-dampening properties of heavy carpet.
This is where the “shortcut” becomes a powerful academic tool. When you are writing a design rationale for a professor, you need to justify your material choices. Why did you use corten steel instead of aluminum? Why reclaimed wood instead of concrete? Planner 5D allows you to visually test these hypotheses in real-time. You can quickly render side-by-side comparisons of different material palettes to see how they interact with your lighting design.
Furthermore, you can practice the art of scale. Textures need to look physically accurate, wood grain must be proportionate to the furniture, and floor tiles must be scaled realistically to the room. By experimenting within an intuitive interface, students learn these visual rules through direct, visual feedback rather than abstract numbers in a properties panel.
The Academic Advantage: Less Stress, Better Portfolios
Ultimately, university is not just about surviving; it is about building a body of work that will launch your career. Your portfolio is your professional passport, and the quality of your visual representations will often determine the opportunities you receive post-graduation.
The struggle with intimidating CAD software often results in students showing up to final reviews with unfinished models, wireframes, or low-quality screenshots. The brilliance of their spatial idea is buried under the poor execution of their digital tool.
By utilizing a tool like Planner 5D, students reclaim their time. You can dedicate those long studio nights to researching architectural history, refining your concept, and perfecting your presentation speech, rather than fighting with software crashes. You can produce high-quality, photorealistic renders that accurately convey the mood, lighting, and materiality of your vision.
Professors do not grade you on how difficult it was for you to use your software; they grade you on the quality of your design and how effectively you communicate it.
Do not let outdated workflows hold your creativity hostage. The software you use should be a silent partner in your design process, an invisible hand that helps pull the ideas out of your mind and into the world.
Embrace the shortcut. Shift your focus back to where it belongs: the pure, unadulterated joy of designing incredible spaces.