This article contains affiliate links. We may earn a commission if you book/purchase through our links at no additional cost to you.
Introduction to WordPress and Hostinger
Are you ready to dive into the world of online presence? If so, setting up a WordPress website is one of the best ways to make your mark. With its user-friendly interface and endless customization options, WordPress has become a favorite among bloggers, businesses, and creatives alike.
But what if you had a hassle-free way to get started? Enter Hostinger—a reliable hosting provider that makes the WordPress setup process not just simple but incredibly fast. Imagine launching your very own website in as little as 10 minutes! Whether you’re starting a blog or an e-commerce site, this guide will walk you through every step of the Hostinger WordPress setup process.
Let’s jump right in and turn those ideas into reality with ease!
Step-by-Step Guide: Setting Up a WordPress Website on Hostinger
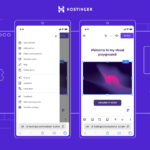
Getting started with your WordPress website on Hostinger is straightforward. First, sign up for a Hostinger account if you haven’t already.
Once you’re logged in, navigate to the dashboard and select “Website.” Here, you’ll find an option to set up a new site.
Next, choose the WordPress option from the list of available platforms. This step will initiate the installation process.
You’ll be prompted to fill in some details about your website. Choose your domain name and enter information such as your email address and password for admin access.
After that, click on “Install.” The setup will take just a few moments to complete.
Once installed, you’ll receive instructions on how to log into your new WordPress site. Access it using “/wp-admin” at the end of your domain name for easy management of content and settings.
Choosing the Right Hosting Plan for Your Website
When selecting a hosting plan on Hostinger, consider your website’s needs. Are you launching a personal blog or an e-commerce site? This decision will guide your choice.
For beginners, the Single Shared Hosting plan offers great value. It provides essential features without overwhelming complexities.
If you’re expecting higher traffic or need more resources, opt for the Premium Shared Hosting plan. It comes with added benefits like increased storage and bandwidth.
Don’t overlook scalability. As your site grows, you’ll want to upgrade easily without significant downtime. Choose a host that allows seamless transitions between plans.
Evaluate customer support options available with each plan. Reliable support can save you time and headaches down the road.
Installing WordPress on Hostinger
Installing WordPress on Hostinger is a breeze, thanks to their user-friendly interface. Once you’ve signed up for your hosting plan, log into your Hostinger account.
Navigate to the control panel where you’ll find the “Website” section. Here, click on “Auto Installer.” This tool simplifies the installation process significantly.
Select WordPress from the list of applications available. You’ll need to fill in some basic details like your website title and desired admin username and password. Make sure these are secure yet memorable.
After entering all necessary information, hit that install button. Within moments, you’ll see a notification confirming that WordPress is set up and ready for action.
Now you’re just steps away from customizing your site!
Customizing Your Website with Themes and Plugins
Customizing your website is where the fun begins. With WordPress, you have countless themes and plugins at your fingertips.
Themes determine the look and feel of your site. Choose one that reflects your brand or purpose effectively. Many are free, while premium options offer more advanced features for a small fee.
Plugins add functionality to your site without needing coding skills. Want to improve SEO? There’s a plugin for that. Need an online store? WooCommerce has you covered.
Don’t overload on plugins; too many can slow down your site’s performance. Instead, focus on quality over quantity.
Keep user experience in mind as you customize. A well-designed website is not just attractive but also easy to navigate, ensuring visitors enjoy their time on your page.
Explore different combinations until you find what resonates with both you and your audience—your unique style will shine through!
Tips for Optimizing Your WordPress Website on Hostinger
To get the most out of your WordPress website on Hostinger, consider optimizing speed and performance. Start by enabling caching through plugins like W3 Total Cache or WP Super Cache. This reduces loading times significantly.
Next, optimize images before uploading them to your site. Use formats like JPEG for photographs and PNG for graphics with transparency. Tools such as TinyPNG can compress files without losing quality.
Regularly update themes and plugins to ensure security and functionality. Outdated software can slow down your site or expose it to vulnerabilities.
Don’t overlook the power of a Content Delivery Network (CDN). Cloudflare is an excellent choice that distributes content globally, improving load times for international visitors.
Monitor performance with tools like Google PageSpeed Insights or GTmetrix. These insights help identify areas requiring improvement, ensuring your website remains efficient and user-friendly.
Common Mistakes to Avoid When Setting Up a WordPress Website on Hostinger
One common mistake is choosing the wrong hosting plan. Many users opt for the cheapest option without considering their website’s needs. This can lead to slow performance and limited resources.
Another frequent error is neglecting backups. Skipping regular backups puts your site at risk of losing valuable content when unexpected issues arise.
Failing to update WordPress, themes, and plugins is another pitfall. Outdated software can expose your site to security vulnerabilities and compatibility problems.
Additionally, overlooking SEO basics during setup often hampers visibility in search engines. Ignoring proper URL structures or metadata limits traffic potential from day one.
Many new users don’t take advantage of Hostinger’s features like caching tools or built-in optimization options. Not utilizing these can result in slower load times that frustrate visitors and hurt rankings.
Conclusion
Setting up a WordPress website on Hostinger is an efficient process that anyone can master. With the right guidance, you can have your site live in just 10 minutes. By choosing the appropriate hosting plan and following the steps to install WordPress, you’ll be well on your way to creating a stunning online presence.
Customizing your website with themes and plugins allows for personalization, making it unique to you or your brand. Remember to optimize your site regularly; speed and user experience are crucial for retaining visitors.
Avoid common pitfalls when setting up your WordPress site by staying informed and leveraging resources available through Hostinger’s support network. With these tips in mind, you’ll not only streamline the setup process but also ensure ongoing success for your website.
Embrace this journey into web development with confidence—your new WordPress site awaits!